
Kimchi (Korean Sauerkraut)
This Kimchi has loads of flavour from the garlic, ginger, fish sauce and Gochugaru (Korean chilli powder). It adds a lovely flavour on top of fried eggs, sausages, added in stir fries, fried rice or cauliflower rice (always add it at the end when your food isn’t piping hot to save the beneficial probiotics), mixed into with mayo to make kimchi mayo, added to a bowl of soup. The options are endless and there a
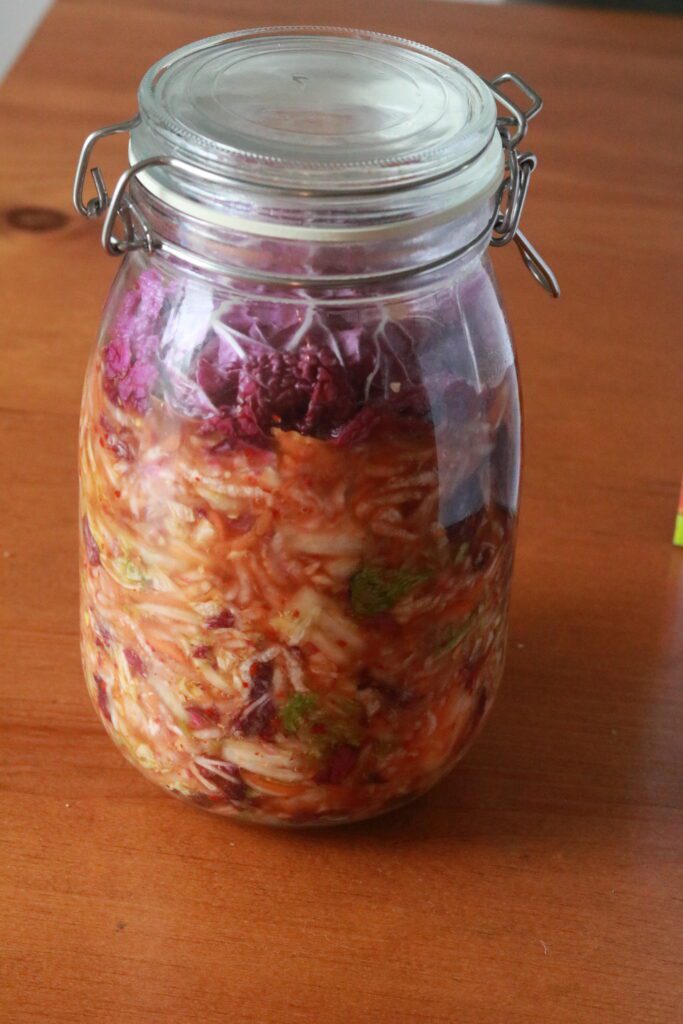
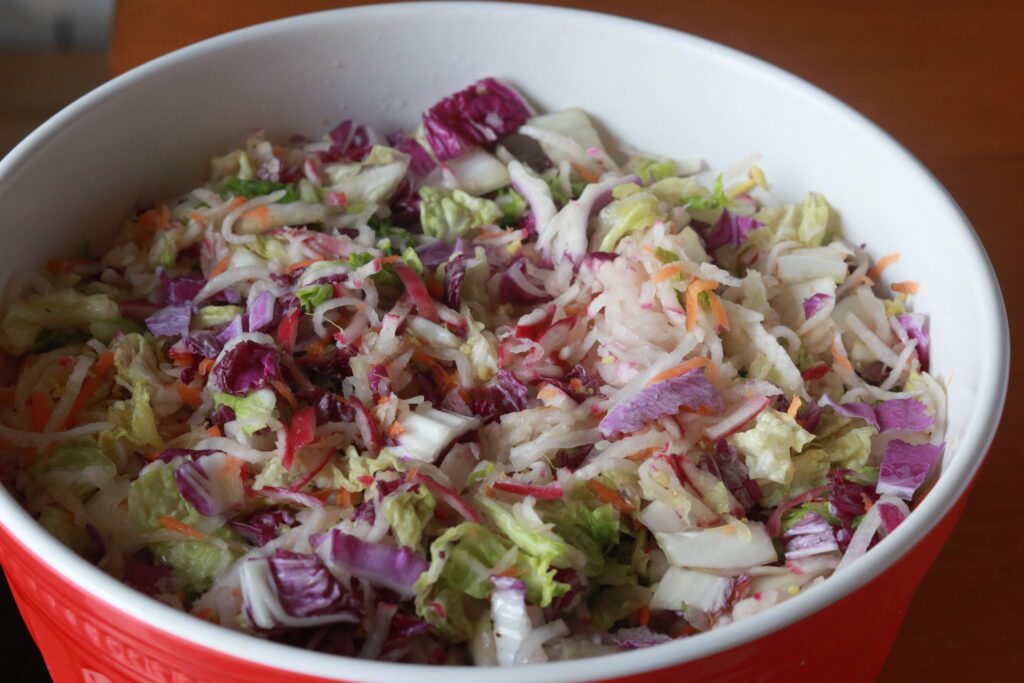
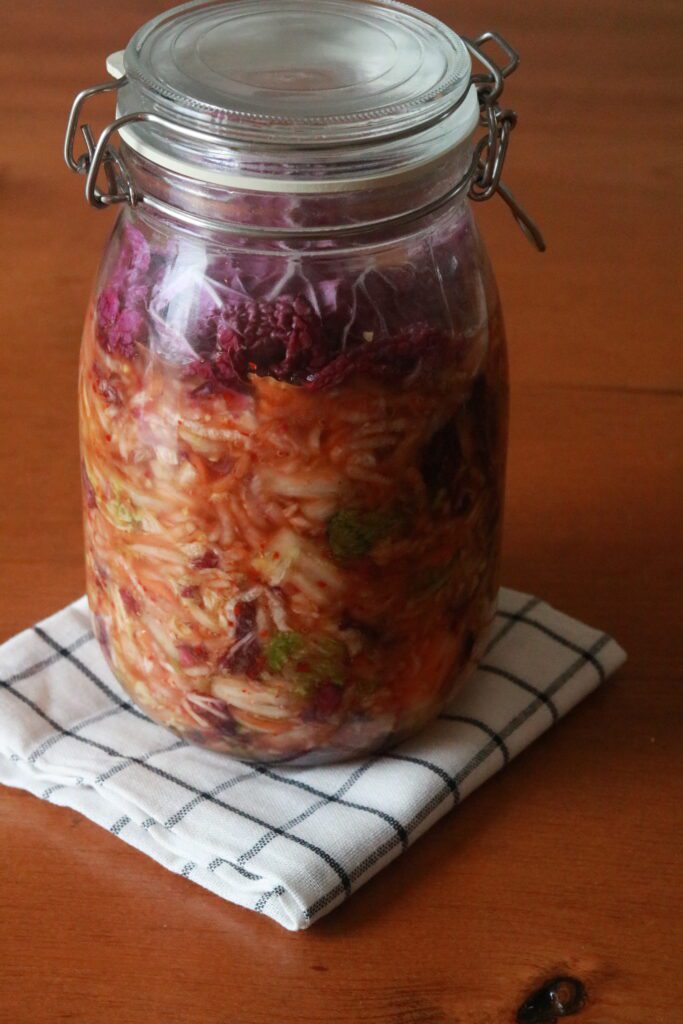
My local organic farm had Napa cabbages that were purple, and daikon radishes that were pink. This made my kimchi so pretty and colourful!
How To Make Kimchi
First, you chop or shred your Napa cabbage. I personally decided to chop it up instead of shred, as I wanted a little bit larger, bite sized, pieces. Save a few outer leaves from your cabbage to use at the top of your jars during fermentation if desired. This helps keep everything submerged and prevent mold from forming.
Next we will add in 1/4 cup of salt (This was for 2 heads of Napa cabbage.) High quality sea salt is best. I started mixing the cabbage and salt with clean hands and letting it release its juices.
Then you can either shred or chop/slice your daikon radish, green onions (or regular white onions), and carrots. I used my food processor fitted with the shredding blade to make this quick and easy.
Next, we will grate or finely mince the garlic and the ginger. I use a piece of ginger a little larger than my pinky finger and about 6 cloves of garlic (I love garlic!).
Add in your fish sauce. I used Red boat brand as it is just contains water, salt and anchovies. Buy it HERE.
Lastly, we will add in the desired amount of Gochugaru (Korean Chili powder). This can range from 1/2 tsp to 6TB. The brand of Gochugaru I bought was quite potent and spicy. Knowing that I was going to be feeding this to my kids, I only used 4 teaspoons. They like spice, but not too much. They love a medium salsa, so that’s the level of heat I was going for. I added this in right at the end, a little at a time, then I tasted a bite. It was the perfect spice level. Keep in mind that at first it might get a little bit spicier, but after a few weeks it starts to mellow out and the spice decreases a bit.
Once you have added all your ingredients to a large bowl, you can mix with clean hands to combine well. Then pack into clean jars or crocks. You can choose to top with a fermentation weight or just use an outer leaf from the cabbage. I chose to use two leaves per jar to keep everything submerged nicely.
How to tell when your Kimchi is ready
You can tell your Kimchi is ready when you see lots of bubbles throughout, and when you smell and/or taste it and it is pleasantly sour. This is when you can put it in the fridge. It will last for many months!
Kimchi (Korean Sauerkraut)
Equipment
- 1 Large Mixing Bowl
- 1 Food processor fitted with the shredder attachment optional
- 2-3 Large Jars for fermentation
- Fermentation Weights optional
Ingredients
- 2 Medium-large heads of Napa cabbage
- 1/4 Cup High quality sea salt, such as Celtic or Baja Gold
- 1-2 Daikon Radish
- 1 Bunch green onions, or 1-2 onions
- 2-3 Medium sized carrots
- 1 2 inch piece of ginger more or less, depending on your preference
- 6 Cloves of garlic
- 1/3 Cup Fish sauce
- 4 tsp Gochugaru or more or less, to taste
Instructions
- Start by washing your cabbage. Take off 2-4 of the outer leaves to use for topping the Kimchi in your jars. Then you can choose to either chop or shred your cabbage.
- Add your cabbage to a large bowl and add your salt. With clean hands, mix and squeeze the cabbage to release some of its juices.
- Next, add the daikon radishes, carrots and regular onions (if using) to a food processor and shred. Alternatively you can do this by hand with a knife or with a box grater.
- Chop your green onions into 1/2 inch pieces, if using.
- Grate or finely mince your garlic and ginger.
- Add all your shredded vegetables ginger and fish sauce to the bowl with the cabbage and use clean hands to combine.
- Add in your Gochugaru, (a tsp at a time if you're not big on spice) and taste a bite to see if the spice level is to your liking.
- Now, fill your jars or crocks with the Kimchi and press down with clean hands or a meat pounder until the liquid covers the vegetables. Add water if necessary. Cover with your reserved cabbage leaves or fermentation weights.
- You can cover with a regular lid or a fermentation lid. A regular lid will work just fine.
- Let the Kimchi ferment at room temperature anywhere between 3 days to 2 weeks. This will depend on the temperature of your home and your desired taste. The best way to tell if its ready to be transferred to the fridge is to taste a little bit. After 3 days, taste to see if it is pleasantly sour. There should also be a good amount of bubbles forming when it is ready.
- Enjoy!